Receive, triage and convert maintenance requests
A request comes from an account with access to Requests or from an asset’s QR code; a manager triages it, and only accepted work becomes a work order.
What you will learn
- Create a clear maintenance request, linked to the right asset.
- Review a request, then approve it, or reject it with a reason.
- Convert an approved request into a work order, and undo a decision when needed.
- Open reporting to people without an account, through an asset’s QR code.
Before you start
What it is for
A maintenance request is a report: someone has spotted a problem, but nobody has decided to act on it yet. The Requests module keeps those two stages separate. Every account with access to it can report (requesters, technicians, storekeepers, managers…), and so can people without an account, through an asset’s QR code. A manager decides what happens next, so your work order list holds only work you have decided to do.
Key concepts
- Request: a report waiting for review. Only its title is required; the description, asset, location and priority help you decide.
- Status: a request is Pending, Approved or Rejected. Approving creates no work order: converting is a separate step.
- Requester: a free, unlimited role on every plan. Requesters create requests and only see their own: they can edit or cancel them while they are pending, then follow the decision and, after conversion, the work order’s status.
- Review: approving, rejecting and converting require the right to review requests. By default, the Owner, Admin and Manager roles have it; without it, people only see their own requests, and the Viewer and Contractor roles have no access to the module.
- Conversion: it creates a work order with the request’s title, description, asset, location and priority. The request is then locked: it can no longer be edited, deleted or sent back to pending.
- Public report: a link attached to an asset’s QR code. Anyone who scans it can report an issue without an account, and the report lands in the same list.
Step by step
Step 1: Open the request list
In the left menu, click Requests. The list sorts requests into three groups: Pending review, Approved and Rejected 1. The Pending, Approved and Rejected filters 2 show a single status; Asset, Location and Priority narrow the list further. Click a request to open it on the right 3.
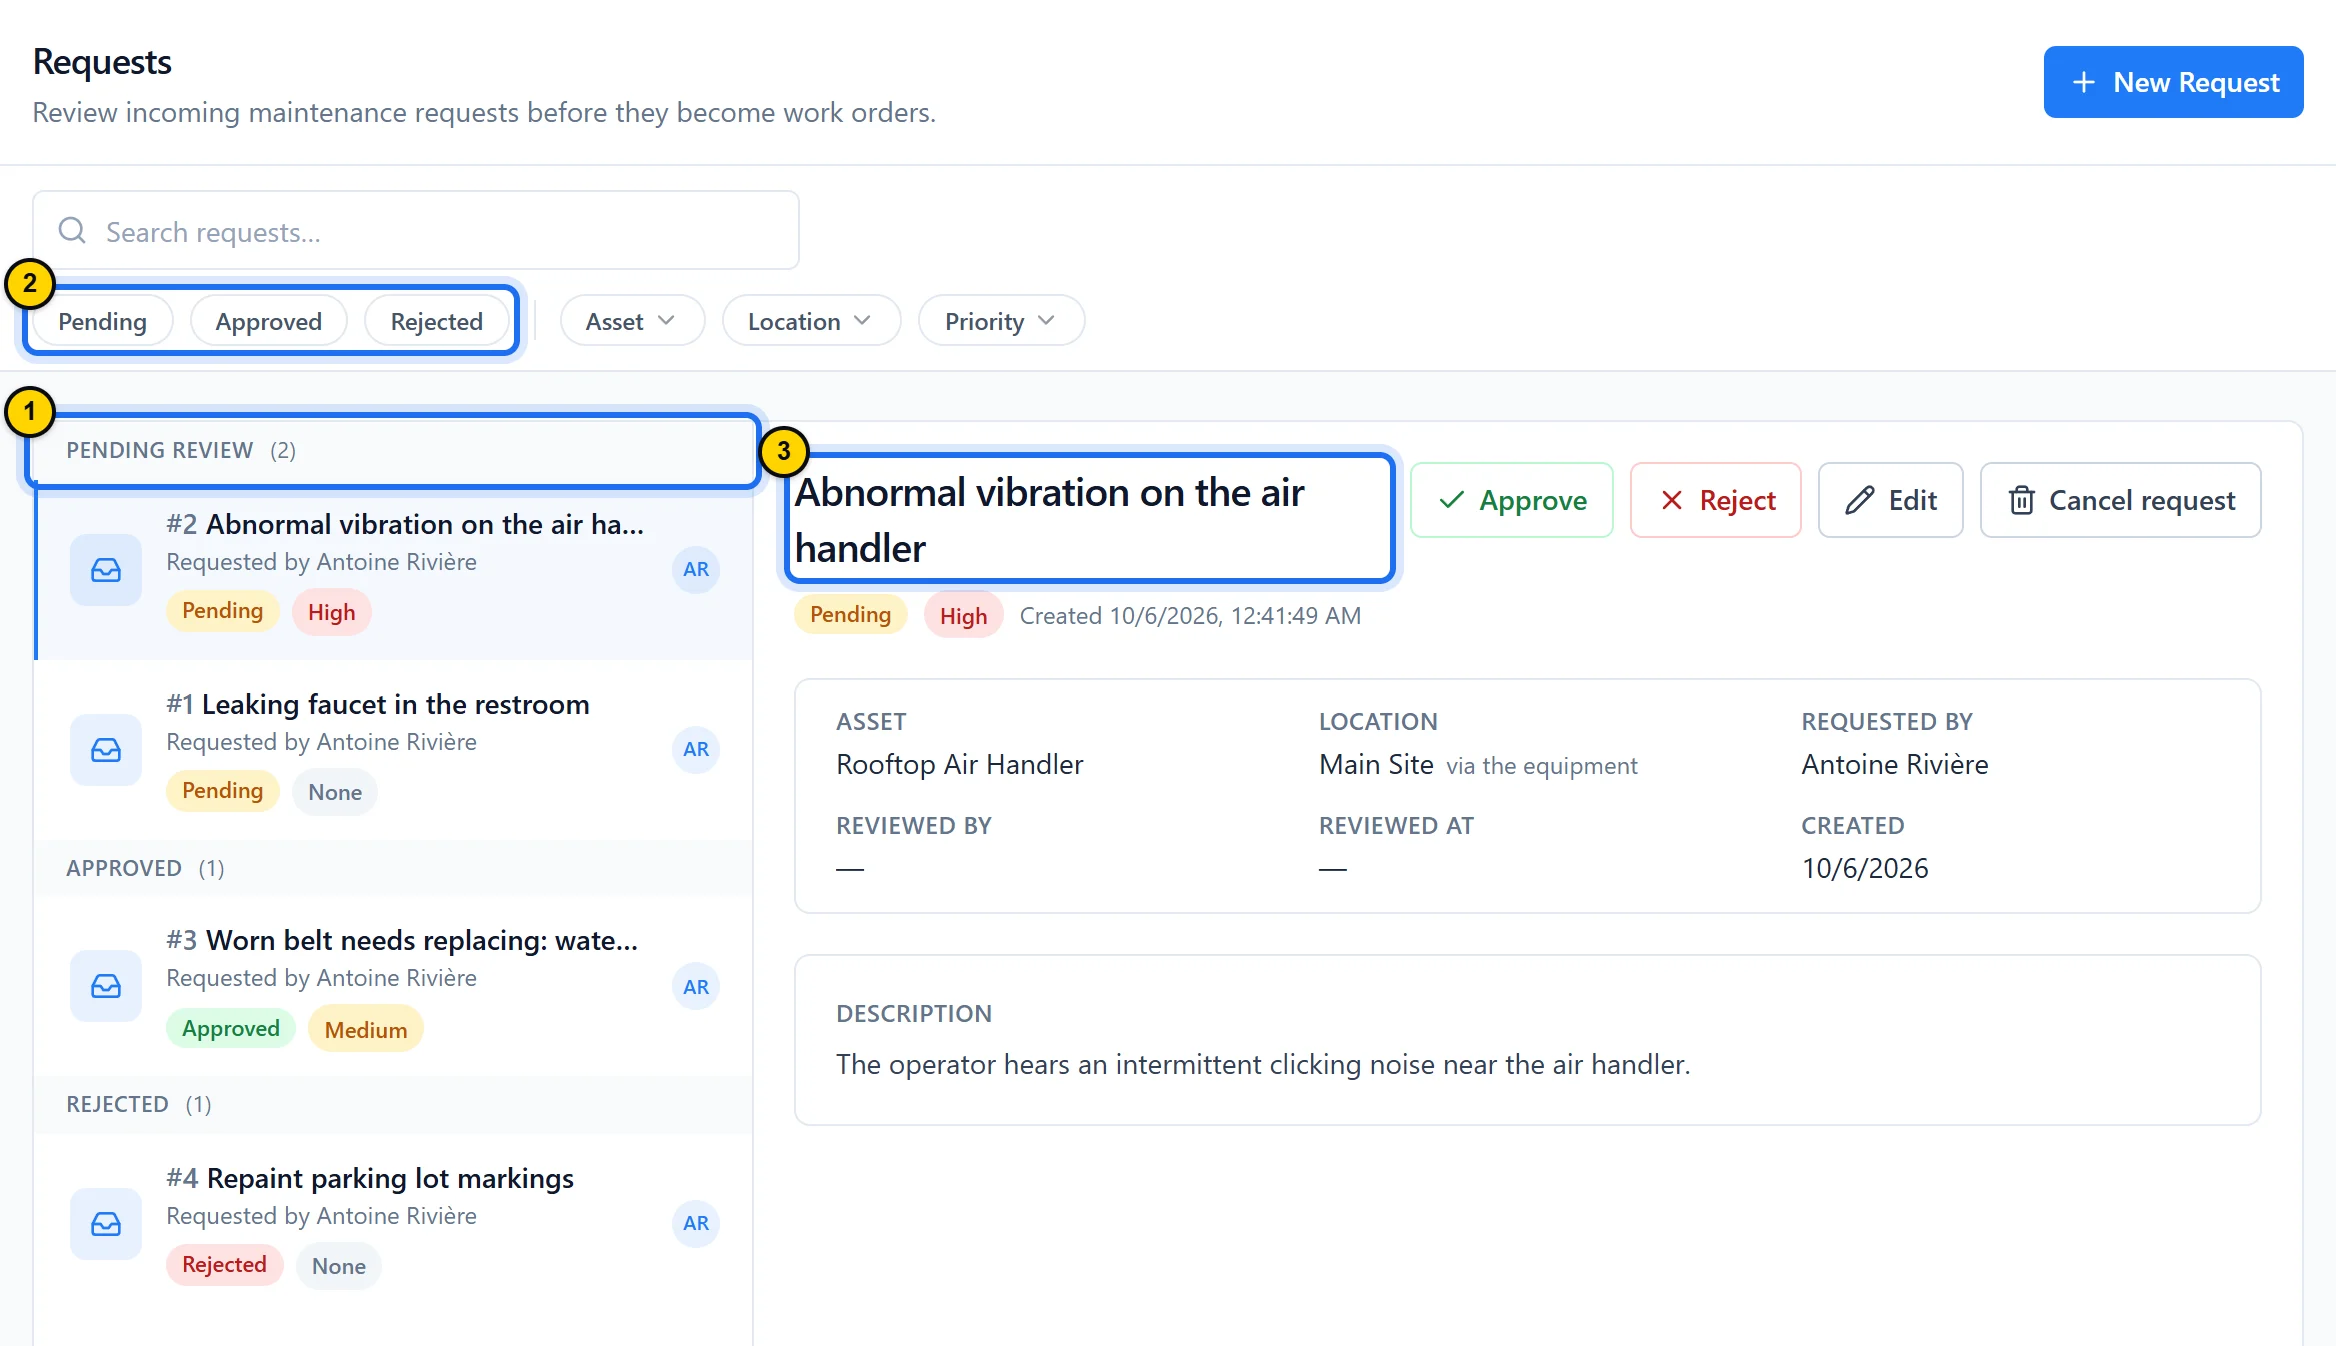
Fig. 3.1The list on the left, the selected request on the right: all the triage happens on this screen.Tap the screenshot to enlarge it. - Marker 1: The list groups: Pending review, then Approved and Rejected.
- Marker 2: The status filters; Asset, Location and Priority sit right next to them.
- Marker 3: The selected request, open in the right-hand pane.
Step 2: Create a request
Click New Request at the top right (from any screen, Create › Request opens the same form). Describe the problem in one line 1: it is the only required field. Pick the affected asset 2: its location fills in by itself. Set the priority. Click Create request 3.
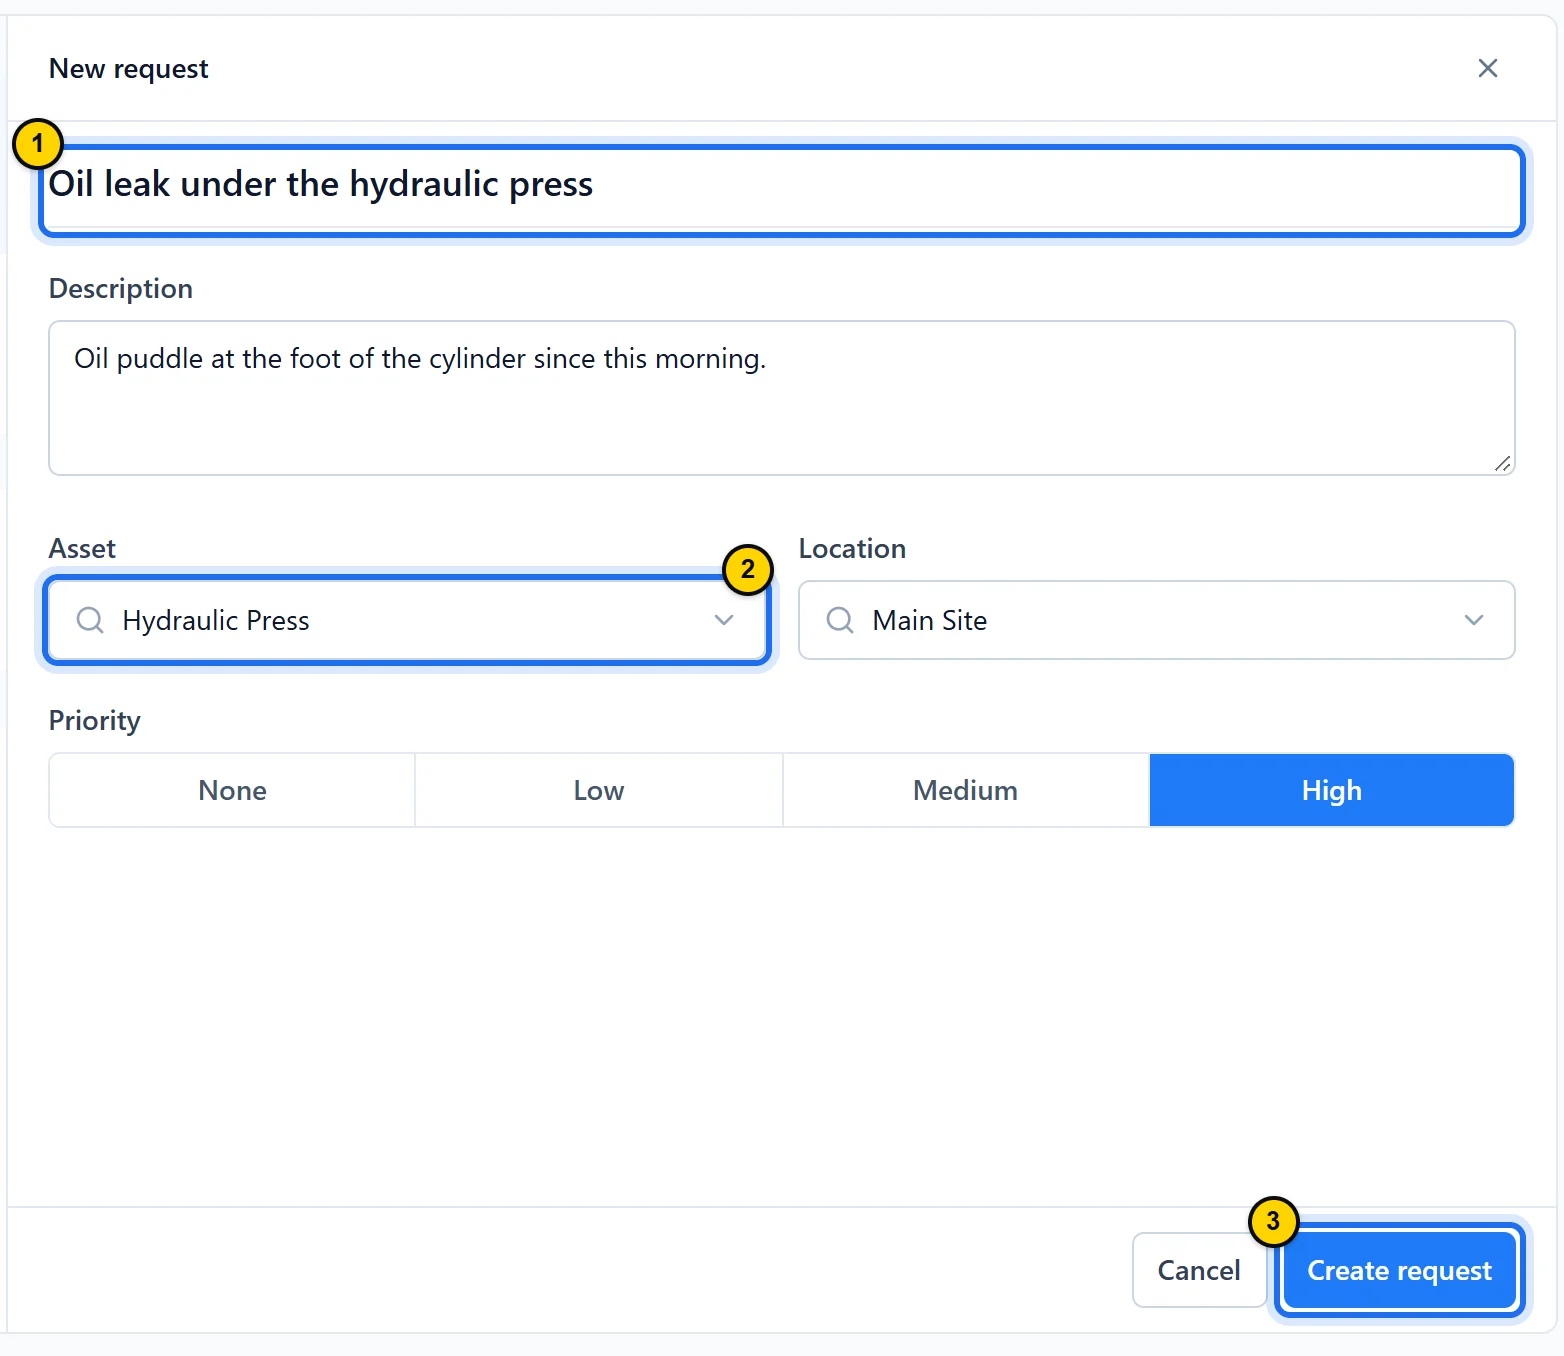
Fig. 3.2A complete request in thirty seconds: the title is enough; the rest helps the manager decide.Tap the screenshot to enlarge it. - Marker 1: The title: one line that says what is wrong. It is the only required field.
- Marker 2: The asset picker; the asset’s location appears next to it.
- Marker 3: Create request sends the request to the list as Pending.
TipRequests carry no photos or attachments: describe exactly what you see, since when and where.
Step 3: Review, then approve or reject
On a Pending request, if the work is justified, click Approve 1. Otherwise, click Reject 2. Enter the Reason, which is required: the requester will read it. Click Reject request to confirm. To fix a detail before you decide, click Edit 3.
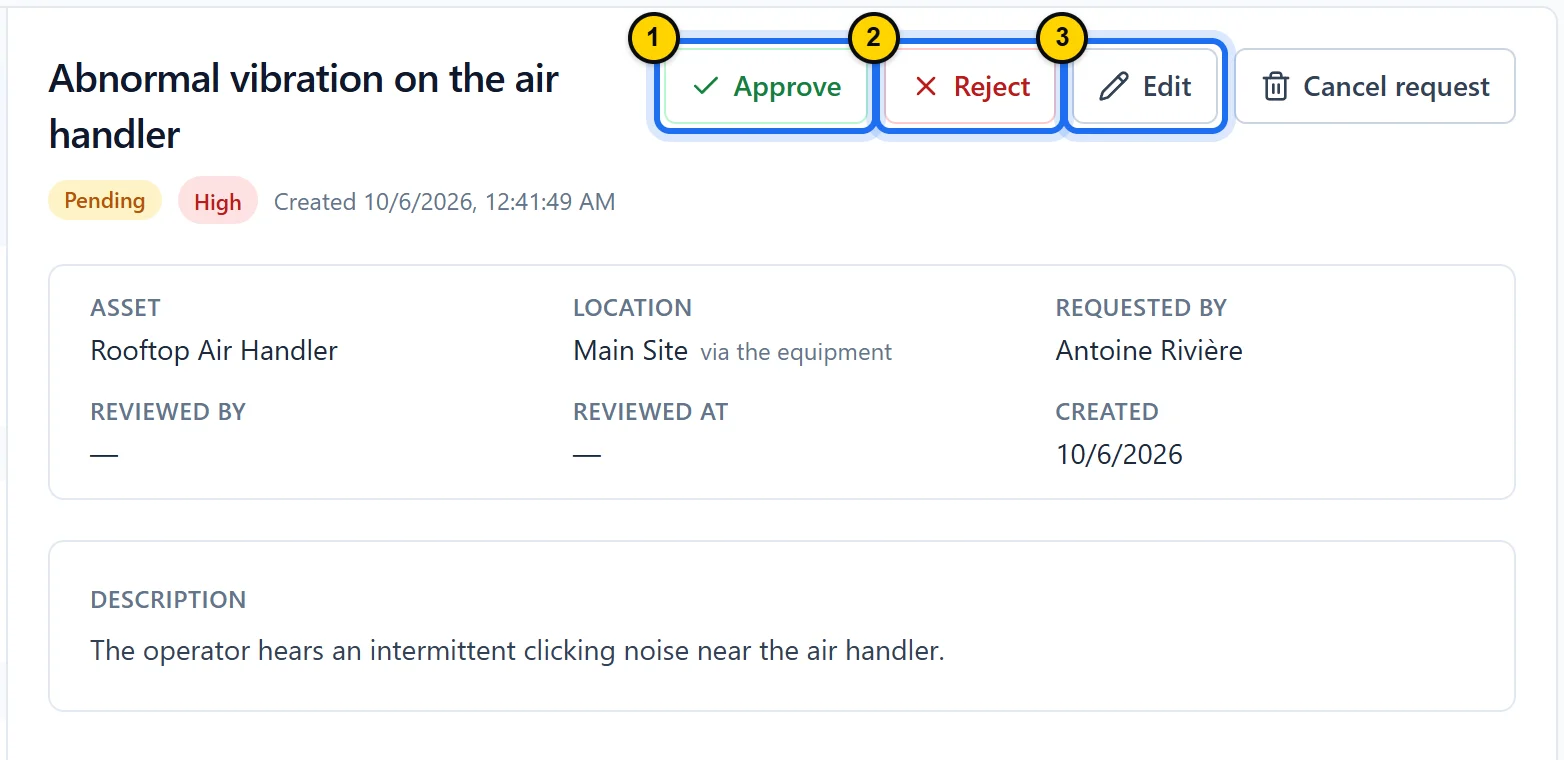
Fig. 3.3Everything you need to decide is on the request: what, where, who and when it was created.Tap the screenshot to enlarge it. - Marker 1: Approve: the request moves to Approved. No work order is created yet.
- Marker 2: Reject: opens a window where the reason is required.
- Marker 3: Edit: corrects the request while it is pending.
TipCancel request deletes the request for good, and the requester is not notified: keep this button for duplicates and typos. To tell them why, reject it with a reason.
Step 4: Convert the request into a work order
Open an Approved request 1. Click Create Work Order 2 at the top right. The button gives way to the question Convert this request?: nothing is created yet. Click Confirm. The new work order opens right away, with the request’s title, description, asset, location and priority.

Fig. 3.4On an approved request, converting starts from the blue button; just to its left, Undo decision is used in the next step.Tap the screenshot to enlarge it. - Marker 1: The Approved status: only an approved request can be converted.
- Marker 2: Create Work Order: once clicked, it gives way to Confirm, which creates the work order, and Cancel, which changes nothing.
TipThe work order starts as a reactive job with no one assigned: assign it as shown in lesson 2. The request stays approved and can no longer be edited; the two stay linked.
Step 5: Undo a decision if needed
Until a request is converted, its decision can be undone. Open the approved or rejected request. Click Undo decision at the top right: on an approved request, it sits to the left of Create Work Order. The window spells out what will happen 1: the request goes back to Pending, and any rejection reason is removed. Click Undo decision again 2 to confirm.
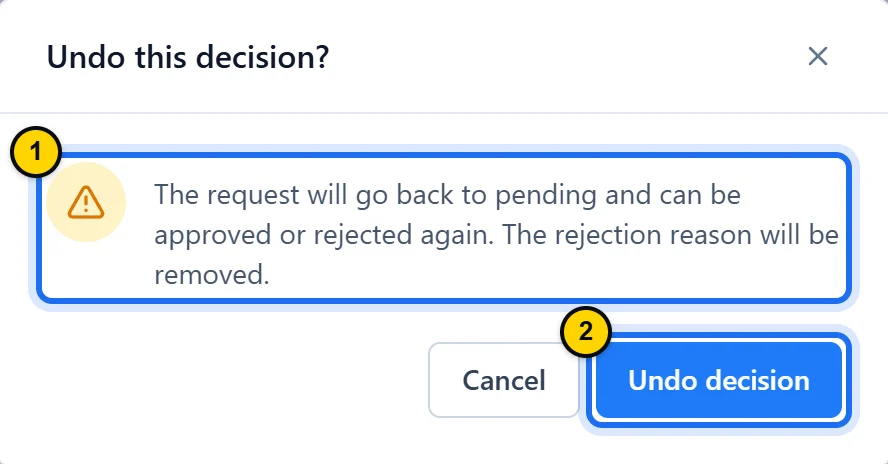
Fig. 3.5Undoing a decision puts the request back among the pending ones, to be decided again.Tap the screenshot to enlarge it. - Marker 1: What the action does: the request goes back to pending, and its rejection reason disappears.
- Marker 2: Undo decision confirms; Cancel closes the window without changing anything.
TipIf Undo decision does not appear in your mobile app, do it from the web.
Step 6: Let anyone report with a QR code
In Assets, open the asset. Click QR code: the Public reporting link section 1 explains that anyone who scans the QR code can report an issue without an account. Click Create the public link 2. The This QR code opens section then appears, with The public report form (no account) already selected. Click Print 3.
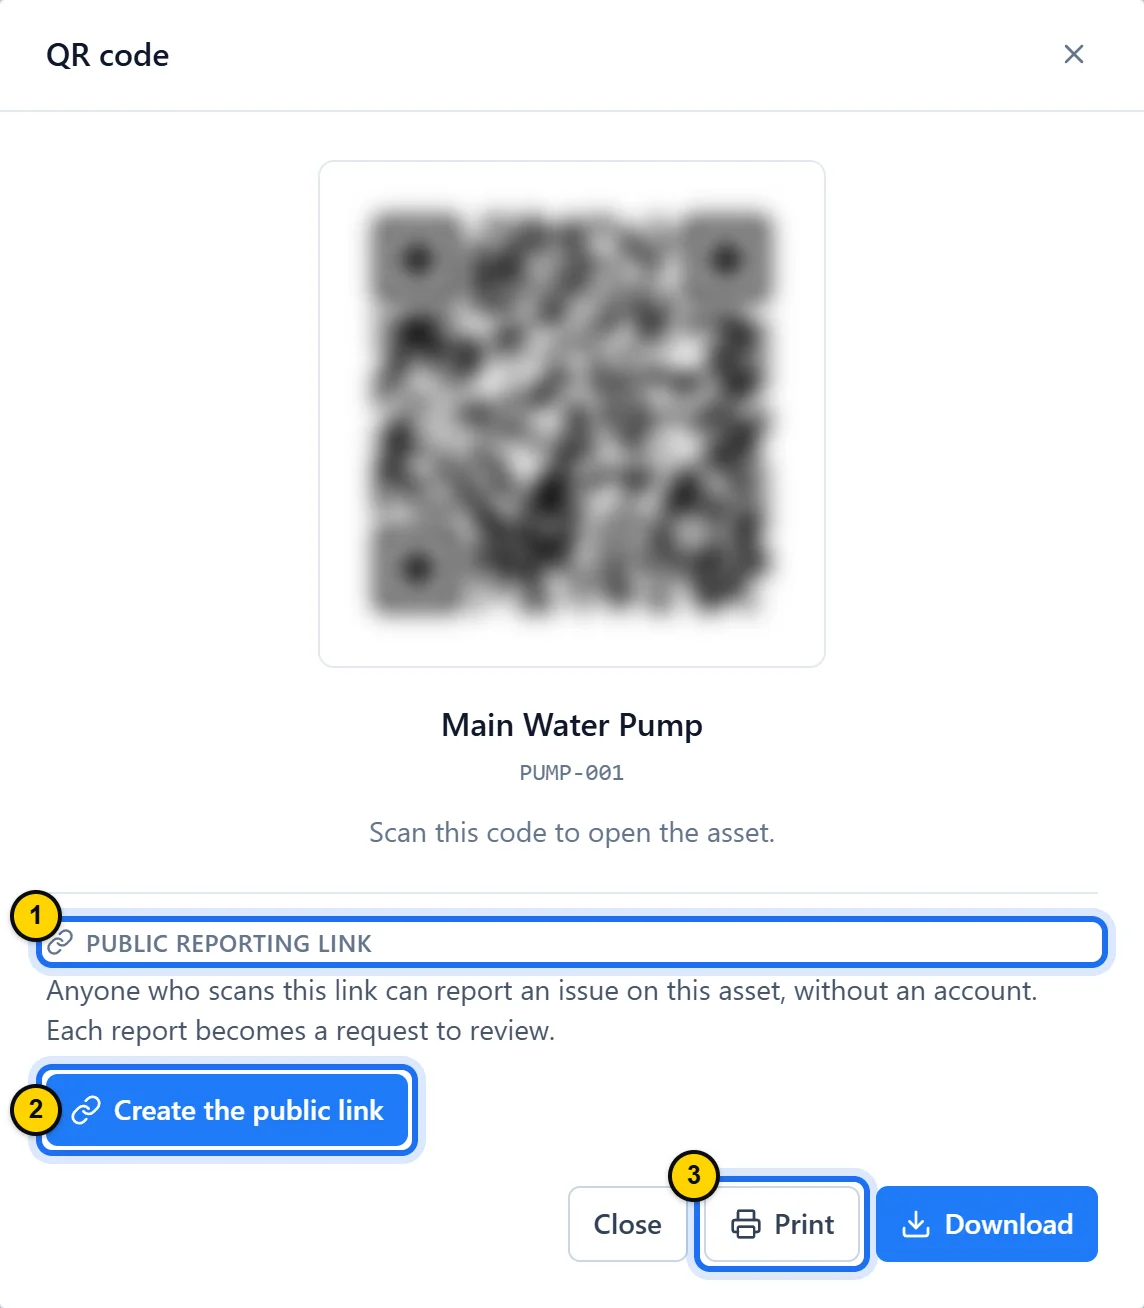
Fig. 3.6Until a link exists, the QR code (blurred here) opens the asset record: the public form is turned on from this window.Tap the screenshot to enlarge it. - Marker 1: The Public reporting link section: by default, only owners, admins and managers see it.
- Marker 2: Create the public link turns on the public form for this asset.
- Marker 3: Print prepares the label for the QR code shown, which is the asset record’s code until a link exists, as here; Download saves the same image.
TipA QR code points to only one address: the public form label therefore does not open the asset record in the mobile app, and Scan an asset rejects it when you fill in a request. To keep both uses, print both labels, one for each This QR code opens option; each time the window opens, The asset page (signed-in team), that is, the asset record, is the one selected.
Good to know
- Requesters are free and unlimited on every plan: invite them from Users & Teams › Invite users with the Requester account type. By default, only owners and admins can invite people.
- On a phone, a requester taps New request, or Scan an asset to fill in the asset in one go (with the asset record’s QR code, not the public form’s), then follows everything in My requests. A manager works through the queue from More › Requests. Without a network connection, a request cannot be sent.
- By default, owners, admins and managers are alerted to every new request. If you have limited their Scope to certain locations, only those assigned to the request’s location are alerted; failing that, those of the nearest parent location that has someone assigned; if nobody is assigned to any of these locations, all of them are. The requester is notified of every decision: approval, rejection with its reason, conversion and return to pending. These alerts appear under the bell icon and in the mobile app; everyone can turn them off in their notification preferences.
- Write a rejection reason that says what will happen instead: a contractor will handle it, another request already covers the problem, or nothing needs doing. It is the only explanation the requester will read.
- The public form asks for the problem in one line; details, a name and a way to get in touch are optional. The request arrives marked Public report, with the Reporter contact if they left one: get back to them if needed, since they get no notification. It is not linked to any account, even when its author has one: it does not show up in their requests. Revoke the link shuts the form down at once, and a new link will have a different address: reprint the labels when that happens.
Key takeaways
- People report from an account with access to Requests, or without one through a QR code; a manager approves, or rejects with a reason.
- Approving creates nothing: converting, confirmed in two clicks, creates the work order.
- Until a request is converted, Undo decision returns it to pending.
Module overviewQR fault reporting →